Check expert advices for anchor decal for nails?
When you looking for anchor decal for nails, you must consider not only the quality but also price and customer reviews. But among hundreds of product with different price range, choosing suitable anchor decal for nails is not an easy task. In this post, we show you how to find the right anchor decal for nails along with our top-rated reviews. Please check out our suggestions to find the best anchor decal for nails for you.
Best anchor decal for nails


1. Whats Up Nails - Nail Vinyl Stencils Variety Pack 4pcs (Anchor, Palm, Hibiscus, Butterflies) for Nail Art Design
Feature
You will receive 4 vinyl sheets: Anchor (20 stencils), Palm (20 stencils), Hibiscus (20 stencils), Buterflies (12 stencils). Sheet size: 3in x 5in (75mm x 125mm).Nail stencils are made from high quality vinyl in Arizona, USA. You can use them with regular polish, gel and airbrush for manicure and pedicure. Stencils are not reusable, they are not meant to be left on nails as decals, stickers or wraps.
Our nail vinyls will help you create beautiful DIY nail art decorations on your fingers and toes yourself at home without visiting a salon. We offer the biggest variety of trendy patterns, image outlines and templates.
You can find step by step instruction below in the How to Use section to learn all tips to get crisp lines and professional looking nail design for your cute mani. You will also receive an instruction card with tips with your order.
Search for whatsupnails on Instagram or Youtube to find tutorial videos and photos using our nail art supplies and accessories to guide you in this adventure! Scroll down to read How To Use nail stencils to receive the best results!
Description
How to Use- Apply nail polish on your nails and wait until completely dry. We recommend using fast dry top coat over nail polish or bare nails to create a flat surface which helps the product stick better. Make sure nail is dry and free of oily residues before applying product.
- Lightly push tape/stencils to the nail using a finger, especially paying attention to the areas near skin, cuticles, and the tips of long nails. You can always cut nail tape to size if they are too long and cut stencils to help them form better to the tip, sides and curvature of the nail. Try peeling stencils from different directions if you have trouble with smaller pieces not remaining on the backing paper. Find your direction and peel fast, holding stencil close the backing sheet. When small pieces remain within a stencil, flip and stick/peel the stencil to the back of the paper to remove all stuck pieces.
- Apply fresh or thinned, not thick or gloopy, nail polish across the tape/stencil. Shimmer and metallic nail polishes work better than cremes. We recommend applying nail polish with a sponge lightly pushing it to your nail, similar to ombre design, this prevents any polish bleeding under the stencil giving cleaner lines. Remove extra nail polish from your skin and cuticles by using a flat brush dipped in acetone or nail polish remover.
- Remove tape/stencils immediately after applying nail polish using your fingers, tweezers or nippers while the polish is still wet. For better results pull the tape following its edges and stencils following the pattern.
- Wait until your design has completely dried before applying top coat. Use fresh or thinned top coat, hold your brush parallel to your nail and try not to touch a nail with the brush, only the top coat drop should touch the nail to prevent smearing.
2. Lovely Nail Art 3D Stickers Decals Silver Gold Black & White Collection of 10 - Fish Seahorse Anchor Hearts Long Ornaments, etc - / GSBWV /
Feature
SUPER-ADORABLE 3D NAIL DECALS: The design variety will set you on the great journey creating your fantasy nails and will last for a long timeLARGE VERITY GREAT FOR ANY OCCASION: 400+ charming stickers suitable for kids and adults
EASY TO USE: these designs are peel and stick type
Package includes: 10 sheets as pictured - dazzling under light silver (2pcs) and gold (3pcs), delicate white (3pcs) and classic black (2pcs)
Description
3D nail stickers make life so much easier for nail art fans who love to change their nail design often.The application of stickers easily and seamlessly presents a new manicure every day. Ideal for young girls, eager to diversify their nail designs.
However, lets not limit the dignity of 3D stickers, because at any age, they are able to create a dizzying effect on the nails,
which is done in few simple steps:
1. Apply background color if desired and let it dry .
2. Carefully peel design off the paper and place onto nail
5. Seal the nail with gel or with clear topcoat.
Note: Some designs were photographed on a contrasting background. Actual sticker sheets are clear.
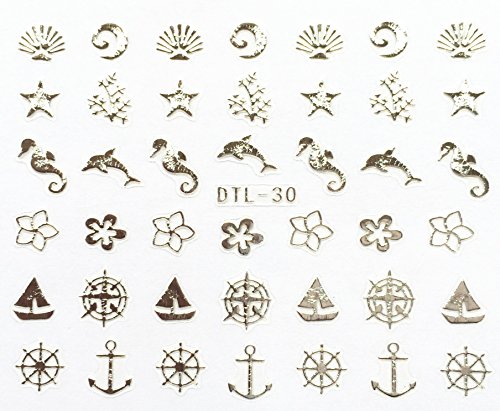
3. Nail Art 3D Decal Stickers Anchor - DTL030 Nail Sticker Tattoo - FashionDancing
Feature
Easy to tape & fix on your fingers.Great for Both Professional Nail Specialist or Nail Art Learner.
You can Easily Make Different Styles of Nail in Minutes.
Description
How to use:1. Paint your nails with the colour of your choice.
2. Gently peel the sticker from the backing paper or with toothpick.
3. Place the stickers on your nail.
3. Apply generous top coat & allow to dry!
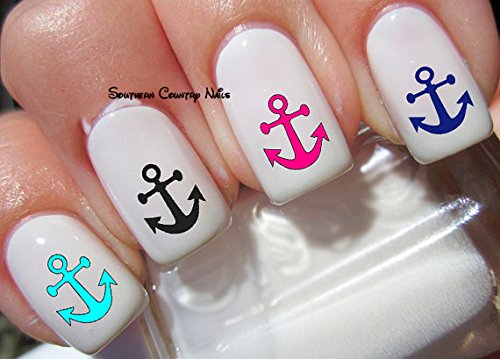
4. Military - Navy Anchor USN Nail Decals - WaterSlide Nail Art Decals - Highest Quality! Made in USA
Feature
Made in USAA fun and fashionable way to dress up your Nails
Easy to apply - Instructions included with each order
Set of 22 decals - enough for even a couple of Toes!
100% Satisfaction Guaranteed
Description
Fun and Fashionable waterslide transfer decals,creating the ultimate nail fashion for all OCCASIONS!
Made in USA!
Fast Shipping
100% Satisfaction Guaranteed
Easy to use, Instruction:
1. Paint nails with a White, or any Light Color of your choice
2. Cut as close as possible around your desired image.
3. Soak it in warm water for 15-20 seconds and then the white paper backing will slide right off.
4. Place it on your nail face up then pat dry with cloth or paper towel.
5. Apply a minimum of 2 quality top coats to seal and protect.
6. Re-apply top coat every couple of days to help reassure the long lasting appearance of the decals. Enjoy!!!
5. Anchor Nail Vinyls by Twinkled T - 1 Sheet of 24 Stencils and 24 Decals
Feature
Twinkled T carries the largest nail stencil collection in the world with over 350,000 fans on Instagram! Follow us @Twinkled_T for ideas.Place your vinyl stencil on, paint a different polish over it, and peel. It's that easy!
TT vinyls are the best bang for your buck. Don't waste money on low quality vinyls with little selection.
You will receive 1 sheet of this design. Color of vinyl may vary but won't affect the final outcome.
Your sheet will come in special TT packaging with instructions and a flap for organized safekeeping!
Description
Not sure what nail vinyls are? They are technically nail stencils, made of vinyl. Check out our Instagram to see fun examples of them being used!This sheet includes 24 anchor stencils and 24 inside anchor decals.
All nail vinyls are handmade by the Twinkled T sisters in Los Angeles, CA and Chicago, IL.
Check out @Twinkled_T on Instagram for tutorials and hashtag your manicure with #TwinkledT to have a chance at being featured to over 350,000 fans.
Twinkled T Nail Vinyls are the easiest way to get the cutest manicures in the simplest steps. We specialize in making the most awesome vinyls filled with creativity and originality. We use top quality vinyl to make sure you get the cleanest lines with no leakage.
We are the original creators of all spiral stickers you see floating around. Shop our selection for loads of originals to give you manicures out of this world!
Please note: Your sheet will come unpeeled and color of vinyl may vary but will not affect the outcome of your awesome manicure!
6. Whats Up Nails - A019 Beach Mode Stamping Plate for Nail Art Design
Feature
You will receive 1 metal stainless-steel stamping plate with white plastic backing. Stamper and scraper are not included. Plate size: 2 3/8in (60mm) x 4 3/4in (120mm).Deep etching of plate images is perfect for both beginners and professional experienced nail artists to create beautiful DIY stamp designs at home or in a salon. We only offer high quality stamping plates with our original and trendy patterns to make your stamped manicure and pedicure look fabulous!
You can transfer design template from plate to your nail using one polish color. This plate can also be used for reverse stamping, just transfer image to stamper, fill outlines with different varnishes or paint using a brush or dotting tool and create your own cute decal or sticker!
You will need to have stamper, scraper, stamping polish or any opaque lacquer that does not dry very fast. You don't need to have any other accessories or supplies for doing a stamping mani.
Search for whatsupnails on Instagram or Youtube to find tutorial videos and photos using our nail art products to guide you in this adventure! Scroll down to read How To Use stamping plates to receive the best results!
Description
How to Use- Remove your new stamping plate from its packaging and remove the plastic protective film from over the metal. When you first receive your plate and after every use wipe clean your plate with acetone or non-acetone nail polish remover without oils.
- Quickly apply a thick layer of nail polish in a few strokes over the design you wish to stamp. Special stamping polishes are recommended but opaque nail polishes that do not dry very fast also work well. Try another polish if you are not getting results you want.
- Hold a plastic card firmly at a 45 degree angle and lightly scrape across the plate to remove excess polish. Try to only scrape once, do not push card to plate too hard and work as quickly as possible to avoid drying.
- Immediately after scraping, quickly transfer the design to your stamper by firmly rolling once across the design from one side to the other or pushing once straight into the design.
- If your image does not transfer you may need to work faster, scrape differently (less pressure or new angle), prime your stamper (with acetone or gentle nail file/buffer) or try another opaque nail polish that doesn't dry very fast.
- Quickly transfer the image from the stamper onto a nail with an oil free and completely dry base color. With a squishier stamper push the stamper straight to the nail, with other stamper heads it might work better to roll it once from side to side to transfer image. Remove excess nail polish from your skin and cuticles by using a flat brush or cotton swab dipped in acetone or nail polish remover.
- When design is completely dry on your nail, apply a layer of fresh top coat with as few strokes as possible. Place a big drop at the cuticle and hold brush parallel to the nail while applying trying not to touch the nail with the bristles, this helps prevents smearing.
7. 72 Anchor Nail Art Decals
Feature
72 DecalsMade in USA
Anchor nail decals, very pretty, bright stickers with unique designs.
Waterslide Decals
Description
You will receive instructions with your purchase. Just about 20 Min. you will have Beautiful Nails These are water-slide decals, so you just trim them, soak them in water to separate the decal from the backing paper, slide them onto your nail and then position them, then add a clear topcoat. They work best with lighter polish and French manicures. 72 Nail Decals on One sheet8. Rudder Anchor Sailing Stickers Water Decals Nail Stickers for Nails Art Wraps 2017 New DIY Nail Design Manicure
Feature
1 piece nail stickerDescription
Specification:100% new brand
Quantity: 1 Sheet
Size: 12.8cm*5.5cm
Package Contents:
1 Sheet
Instruction:
Brand New in retail package and good quality!
One sheet of adhesive nail art stickers to fit all fingernails, toenails and nail tips.
Suitable for Professional Salon use or home use
How to Use:
1. Clean the surface where the design is to be placed.
2. Select a design and peel off by your nail. (Don't touch the glue)
3. Place the design in nail/tip and rub it gently several times.
4. Apply top coat for best result.
NOTE:
Do not apply stickers to sensitive skin.
Not recommended for little children.
9. Nail Art 3D Stickers - Nautical & Tropical Theme, 4-Pack /CA-V/
Feature
NAUTICAL & VACATION INSPIRED 3D DECALS- 4 pack themed designs. You will love the great variety, and challenge which design to use first.VERY EASY TO USE - Simple to use - with brilliant looking results. Takes seconds per design. No more complex painting!
INSTRUCTIONS INCLUDED - For application refer to instructions on the back of the package or below
MIX, MATCH AND HARMONIZE - Plenty of designs to choose from.
Description
Nautical inspired designs for adventure sailing to tropics.Fan variety will set you on the great journey creating vacation perfect manicure and will last for a long time.
Not going to tropics? Nautical nail art not only bring you a fresh vibe, but also give you a feeling of vacation.
The application of 3D stickers easily and seamlessly presents a new manicure every day.
At any age, they are able to create a dizzying effect on the nails, which is achieved in few simple steps:
1// Apply background color if desired and let it dry
2// Carefully peel design off the paper and place onto nail
3// Seal the nail with gel or with clear topcoat.
10. 60 Nautical Summer Beach Fun Nail Art Decal Sticker
Feature
60 stickersGreat gift for any nail lover.
The latest trend in fashion, nail decals / stickers are a great way to show off!
peel & Stick


Recent Comments